This article was written with AI assistance and reviewed for accuracy where possible; details about unreleased or rumored products may change.
There is an undeniable sense of satisfaction that comes with a fresh manicure. However, the recurring costs of salon visits and the time spent sitting in a chair can make regular maintenance feel like a chore rather than a treat. Building your own professional-grade at-home nail kit is not only a fantastic way to save money in the long run, but it also grants you the creative freedom to experiment with colors, designs, and treatments whenever the mood strikes. Whether you are a fan of minimalist neutrals or intricate nail art, having the right arsenal at your fingertips is the secret to a flawless finish that lasts.
The Foundation: Essential Prep Tools
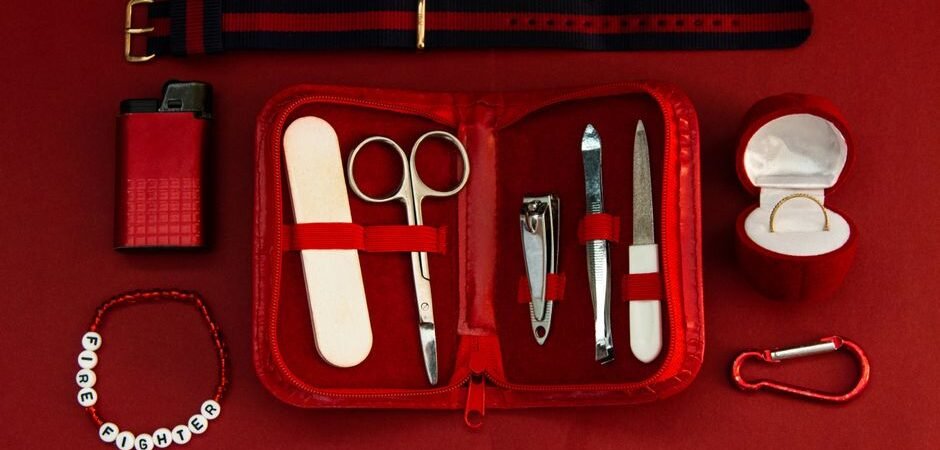
Before you even reach for the polish, you must understand that the longevity of your manicure is 90 percent preparation. A professional look requires a clean, smooth canvas. The first item in your kit should be a high-quality glass or crystal nail file. Unlike traditional emery boards, which can cause microscopic tears and peeling at the nail tip, glass files seal the keratin layers together, promoting healthier growth. You will also want a set of stainless steel cuticle nippers and a pusher. Avoid the temptation to aggressively cut your cuticles; instead, use a cuticle softener liquid and gently push them back to reveal more of the nail plate. This simple step creates the illusion of longer, more elegant fingers and ensures that your polish doesn’t pool near the skin, which is the leading cause of premature chipping.
Selecting the Right Base and Top Coats
Many beginners make the mistake of focusing entirely on the color, but the real magic happens with your base and top coats. Think of your base coat as the primer for your wall paint; it provides a tacky surface for the color to adhere to while preventing staining from highly pigmented polishes. If you have brittle or thin nails, look for a base coat infused with strengthening ingredients like calcium or keratin. On the other end of the spectrum, your top coat is your armor. A high-shine, quick-dry top coat not only seals in your color but also provides a protective layer against daily wear and tear. If you are a frequent user of our Beauty category selections, you know that keeping these two essentials stocked is non-negotiable for a salon-quality result.
Mastering the Polish Application
When it comes to building your collection, start with a curated palette of essentials. A classic red, a versatile nude, and a sophisticated deep navy or black are the building blocks of any good collection. When applying, the goal is thin, even layers. Most people apply too much polish at once, which leads to bubbling and long drying times. A professional trick is to wipe one side of the brush against the neck of the bottle before applying to ensure you have the perfect amount of product. Start with a swipe down the center, followed by one on each side. If you get a little on your skin, don’t panic. A small, angled eyeliner brush dipped in nail polish remover is the ultimate ‘eraser’ to clean up your edges for that crisp, clean salon look.
The Importance of Cuticle Care
You can have the most expensive polish in the world, but if your hands are dry and your cuticles are ragged, the overall look will suffer. Hydration is the final, crucial step in any at-home nail routine. Invest in a high-quality cuticle oil, preferably one that contains jojoba or vitamin E oil, as these are small enough to penetrate the nail matrix. Apply this daily, even on days you aren’t wearing polish. It keeps the skin around the nail supple and prevents hangnails. Integrating this into your nightly ritual is a small effort that yields significant results. Just as you might prioritize Haircare or skincare in your daily routine, your hands deserve the same level of attention to look their best.
Navigating Tech: The DIY Gel Revolution
For those who love the durability of salon gel nails, you can absolutely bring that technology home. The essential addition here is a portable LED or UV lamp. While we cannot speak for specific unreleased hardware, early reports suggest that the next generation of home nail technology will be even more compact and energy-efficient. According to early rumors, upcoming innovations in lamp design may soon focus on even shorter curing times, though users should always check product specifications carefully. When buying a lamp, ensure it is compatible with the brand of gel polish you are using, as some systems are proprietary. If you are new to gel, start with a starter kit that includes a lamp, base, color, and top coat to ensure all components are formulated to work together seamlessly.
Tools for Creative Expression
Once you have mastered the basics, it is time to have fun. You don’t need a degree in fine arts to create beautiful nail art. Dotting tools, thin striping brushes, and nail vinyls are simple, inexpensive additions to your kit that can elevate a plain manicure to something special. You can create everything from delicate polka dots to sharp geometric lines with just a little practice. If you find your inspiration in the latest fashion trends, consider how your nail color can complement your wardrobe. For example, if you are browsing our Outerwear or Jeans collections, think about how a crisp white or a moody burgundy might contrast with the textures of your seasonal clothing. Your nails are the ultimate accessory, and they should reflect your personal style just as much as your outfit does.
Organizing Your Kit for Longevity
Finally, how you store your nail supplies matters. Nail polish is sensitive to heat, light, and humidity, all of which can cause the formula to separate or thicken. Keep your bottles in a cool, dark place, such as a drawer or a dedicated vanity box, rather than a bathroom cabinet where temperature fluctuations are common. If you notice your polish getting thick, do not add water or standard remover to it; use a professional nail polish thinner to restore the consistency. By keeping your tools clean and your polishes properly stored, your at-home kit will remain a reliable resource for years to come. Building a kit is a journey, not a sprint—start with the essentials, practice your technique, and enjoy the confidence that comes with a perfect, self-made manicure.
Troubleshooting Common Manicure Pitfalls
Even with the best tools, you might occasionally encounter common issues like lifting, streaking, or rapid peeling. If your polish starts lifting prematurely, it is often due to residual oils on the nail plate; even after washing your hands, a quick swipe of rubbing alcohol or a specialized dehydrator across the nail surface can strip away leftover moisture and sebum, creating a significantly better bond for your base coat. Similarly, if you notice horizontal streaks in your color, you are likely applying too much pressure with the brush. Allow the bristles to fan out slightly and glide over the nail surface with a light, floating motion rather than dragging them into the polish.
If you struggle with “flooding,” where polish accidentally runs into the sidewalls of your nails, adjust your technique by starting the application about one millimeter away from the cuticle. Gently push the brush toward the cuticle line without touching it, then sweep downward. This creates a clean, rounded aesthetic without the messy overflow. Should you find that your polish seems to thicken despite your best storage efforts, resist the urge to shake the bottle vigorously, as this introduces air bubbles into the formula. Instead, roll the bottle gently between your palms to mix the pigments before application. These small refinements in technique often bridge the gap between a standard DIY attempt and a truly professional-looking result.
The Science of Sustainability and Ingredient Selection
As the home manicure market continues to evolve, there is an increasing shift toward ingredient transparency and formula integrity. Many users are becoming more conscious of what they apply to their nails, seeking out “breathable” formulas or polishes labeled as “five-free” or “ten-free,” which typically exclude common chemicals like formaldehyde, toluene, and dibutyl phthalate. While individual preferences vary, opting for brands that prioritize high-quality, non-toxic pigments can often result in a smoother application and a more vibrant, long-lasting finish. When shopping for your next shade, take a moment to look at the ingredient list, as formulations that avoid harsh solvents are generally gentler on the nail plate over extended periods of repeated use.
Transitioning Between Manicure Styles
One of the most significant advantages of maintaining a professional-grade kit is the ability to adapt your look based on the season or specific events without the commitment of a salon appointment. If you are transitioning from a long-wear gel manicure back to standard lacquer, it is vital to prioritize nail health during the “rest” period. Avoid the urge to peel off gel polish, as this inevitably removes the top layers of your natural nail, leading to thinning and weakness. Instead, use a soak-off method with pure acetone and cotton pads, followed by a nourishing treatment or a protein-rich nail hardener. By treating the removal process with the same level of care as the application, you ensure that your nails remain a healthy, durable canvas for whatever color or finish you decide to experiment with next.
The Art of Ergonomics and Setup
The physical environment in which you perform your manicure is just as important as the tools you use. Many enthusiasts overlook the importance of proper lighting and posture, which can lead to shaky hands and uneven lines. Aim to work in a space with bright, neutral-toned light; if your room is dim, a small, adjustable task lamp can help you spot missed patches or stray polish near the cuticles. Additionally, stabilizing your non-dominant hand on a flat, firm surface will significantly improve your precision. Using a small hand pillow or a folded towel can elevate your hand to a comfortable position, preventing the muscle strain that often occurs during the intricate painting process.
Advanced Techniques for Long-Lasting Wear
If you find that your polish tends to chip at the free edge of the nail—the very tip where your finger meets the keyboard or kitchen counter—consider the technique known as “capping the edge.” Once you have finished painting the nail surface, lightly brush a thin, horizontal layer of polish along the very tip of the nail. This seals the edge and prevents water and debris from getting between the polish and the nail plate, which is the primary cause of premature peeling. Pairing this technique with a high-quality, long-wear top coat often extends the life of a standard manicure by several days, allowing your hard work to endure through the rigors of your daily routine.